


Trimming a tree is necessary to maintain its overall health, and structural integrity and to improve its aesthetic appeal.
If done in an incorrect manner or at the wrong time of year, you can actually do more harm than good, in some cases killing the tree.
Here are the steps that you should follow for the best results.
Trimming a tree is a delicate process. And while it is sometimes needed for the tree’s survival, it is often the cause of a tree’s death. The following are steps that will come in handy in helping you to avoid killing your tree during the trimming process.
Step 1: Reason for trimming the tree (Objective)
The first step you should take should be figuring out why exactly you want to trim the tree. Doing so will give you a clear purpose. This will reduce the risks of going overboard and doing more damage.
Some reasons for trimming can be:
- Canopy thinning for more light penetration
- Canopy lift for more light penetration
- Weight reduction
- Better curb appeal
- Deadwood removal
- Reduce hazard risk
- Trim for better fruit yield
Figuring out what you want to achieve will also help you to choose the ideal season to do the trimming. This is important as different seasons promote different growth rates and also expose trees to different threats as far as diseases are concerned.
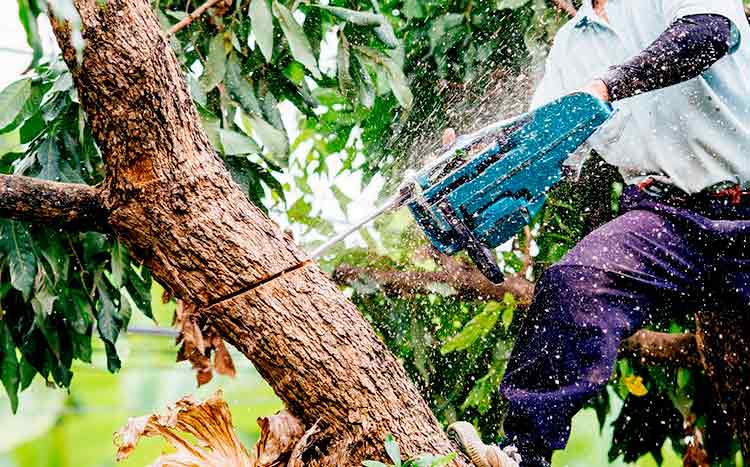
Step 2: Collect and prepare your tools
Sharper tools do the least damage to a tree. Using the right tools also helps to minimize the risks of ending up with tree-killing injuries. Therefore, getting the right tools, and then ensuring that they are sharp enough to make clean cuts, is something that is essential for a tree’s after-trimming survival.
Some of the tools that you may need include a bow saw, a heavy-duty lopper, pruning shears, a pruning saw, and a pole saw with lever action. Pruning shears are perfect for trimming small trees, loppers are great for branches that are about 2 inches thick, while a pruning saw is ideal for cutting branches that are a little bit thicker.
After you have gathered the right tools, sharpen them. This will ensure that they make cleaner cuts hence reducing the risk of damage to the bark and other essential parts of the tree.
Step 3: Look at the tree and identify the main parts
By observing the tree, it is easy to identify the main branches of the tree. These are the ones that make up the main “skeleton” of the tree and they should thus be avoided.
Step 4: Start with the damaged and diseased branches
Diseased and damaged branches are a liability. They use up resources and weigh the tree down with their unnecessary weight. They also make the tree vulnerable to pest infestations and diseases. Therefore, if you care about the tree’s health, you really have no choice but to remove it.
Starting with branches that must be removed will give you a better idea of how much of the tree will be left and how far you can go as far as cutting off additional branches is concerned. Remember, in order to ensure that your tree survives the trimming process, you must avoid the temptation of trimming more than 25% of the tree.
Starting with dead and diseased branches will also give you a better idea of how to proceed if you want to shape the tree. Doing so will help you to avoid the need of having to reshape the tree later on when the branches are eventually removed.
Step 5: Proceed to trim thick sections
Now that you are left with only healthy parts of the tree, it is time to start considering areas that will not only benefit from trimming but also survive it. The best place to start is areas that have close branches, crossed branches, and ones that are growing inwards. Cutting these branches will improve tree health by promoting good air circulation and maximizing sun exposure. It will also discourage pest infestation.
Step 6: Focus on branches that are overhanging, blocking, or obstructing
The next step is to then trim any branches that are either obstructing movement in walkways or interfering with utilities. If there are any overhanging branches that are damaging your roof or threatening to fall, this is the time to trim them out.
Step 7: Finish up by trimming for shape
With the tree trimmed in order to either keep it healthy or prevent it from being an annoyance or causing any damage, it is now time to make it aesthetically appealing.
Start with an idea of the shape that you want it to assume. Most people prefer a rounded shape. And in such a case, simply start by trimming branches that stick out from the desired shape. Make these cuts in a deliberate manner, and when doing so, take turns to observe the tree from a distance to gauge your progress — as far as getting it to conform to the desired shape is concerned.
Things you should keep in mind when trimming the tree
When following the above tips, there are a few things or rules that you should follow if you want to avoid killing your tree. These are some of the most important ones.
- Never trim more than 30% of a tree’s foliage. This is because removing tree limbs does create some stress on the tree as it uses those branches and leaves to create nutrients. Reducing that by more than ¼ in one go can shock the tree and potentially kill it.
- Think about the weight distribution of branches – If you are planning a canopy lift by removing lower branches, make sure you are not removing too many branches. Try not to go more than halfway up the tree’s trunk. This can leave the tree top-heavy and prone to damage in strong winds.
- Angle your cuts downwards – When trimming, always make sure that your cuts are at an angle and that they face down and away from the tree’s stem. Making your cuts at an angle will minimize the size of the wound created. And this will help the tree to recover faster while also minimizing its exposure to diseases and pests.
- Leave to collar – You should always ensure that you avoid cutting too close to the tree’s bark ridge. Cutting this close to the stem could cause significant damage to the tree’s bark and ridge, and the cumulative damage from all the cuts that you make may be too much for the tree to recover from.
- Cut branches in sections to reduce bark tares – For larger and longer branches, it is always a good idea to start by making two initial cuts before making the final one. Doing so will keep the branch’s weight from ripping the bark as the tree is falling. The two initial cuts will deny the falling branch the leverage that it needs to rip off the bark, and hence help to protect the tree from ending up with an exposed stem.
- Keep cuts close to the bark ridge to enable healing – While it is important to avoid cutting into the branch bark ridge, cutting too far away from the ride is also inadvisable. This is because it will leave you with a long stump. And this will expose the tree to the risks of insect infestation and rotting.
Generally, when it comes to trimming trees, you should be looking for branches that are likely to present problems. Branches that are rubbing together or ones that are growing too close to each other will have a negative effect on the branch’s health and appearance, so making them a priority is prudent. The same applies to diseased or dying branches. Including weak branches and ones that are either obstructive or pose a danger to loved ones, is also recommended.
In short, trimming such branches off your tree, while sticking to the “not more than 25%” rule, is at the heart of a successful trimming process.

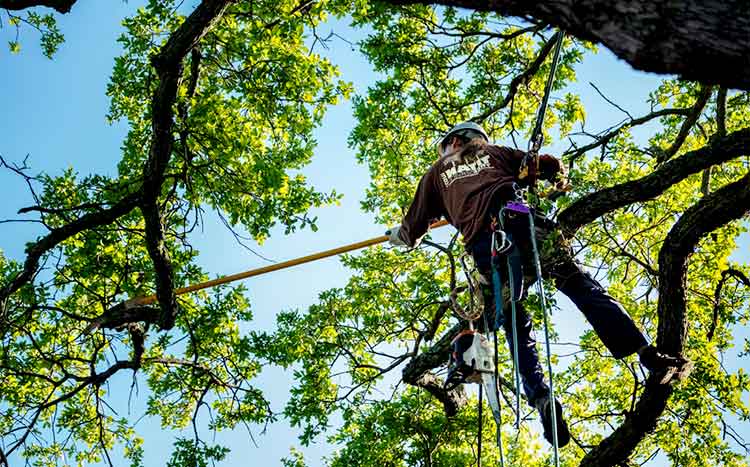
Getting help from a good tree trimming contractor
If you are worried about killing your tree, you can let a skilled and qualified tree trimmer handle the trimming process. The easiest and fastest way of finding someone who will trim your tree safely is to use GoTreeQuotes.com. It offers a free service that quickly matches you with the top-voted local experts.
Using the website, you can get 3 estimates fast by real certified experts in your area in just 2 minutes. Here is how it works.
- You scroll to the top of the page and enter your Zip code.
- Answer questions about your tree trimming needs
- Your details will be forwarded to three local experts.
- You will then receive a price estimate for the job and some friendly advice.
IMPORTANT: There is no obligation to hire. This is a free tool and service to be used at your pleasure.


